|
Size: 8830
Comment:
|
Size: 8948
Comment:
|
| Deletions are marked like this. | Additions are marked like this. |
| Line 22: | Line 22: |
| First log into the [[https://pools.iram.es | Pool data base]] (ask the AoD for the login information if the NIKA2 account in force) and click on the NIKA2 tab. | First log into the [[https://pools.iram.es | IRAM 30m pools webpage]] (ask the AoD for the login information of the NIKA2 account in force) and click on the NIKA2 tab. |
| Line 24: | Line 24: |
| {{attachment:PoolDatabase2.png | IRAM 30m pools webpage | width=850 }} | {{attachment:PoolDatabase2.png | NIKA2 projects | width=850 }} |
| Line 87: | Line 87: |
| '''Note that this script uses a non-optimal scan size. For the optimum scan size, see the above recommendation. ''' |
Pool Observations
From our experience, the chances of success of a program are higher if it is scheduled in a pool than in the traditional way of dedicated observing blocks. This is due to the flexibility of pooled observations with respect to demand on weather quality and equipment availability. It is therefore advantageous for any project to participate in these pooled observing sessions. Participation is of additional interest for low rated proposals which may otherwise not be scheduled. Astronomers with little or no experience are welcome as visitor observers at the IRAM 30m radio telescope.
Contents
Go to the NIKA2 main page.
Pool Logistics
Pool observations are carried from a dedicated pool account (ask the AoD for the login information). Each project has a folder within the home directory of the pool account with instructions on how to proceed. Read carefully the README file before to start. For example, see the file ~/001-17/README_001-17.txt.
Choose a project
First log into the IRAM 30m pools webpage (ask the AoD for the login information of the NIKA2 account in force) and click on the NIKA2 tab.
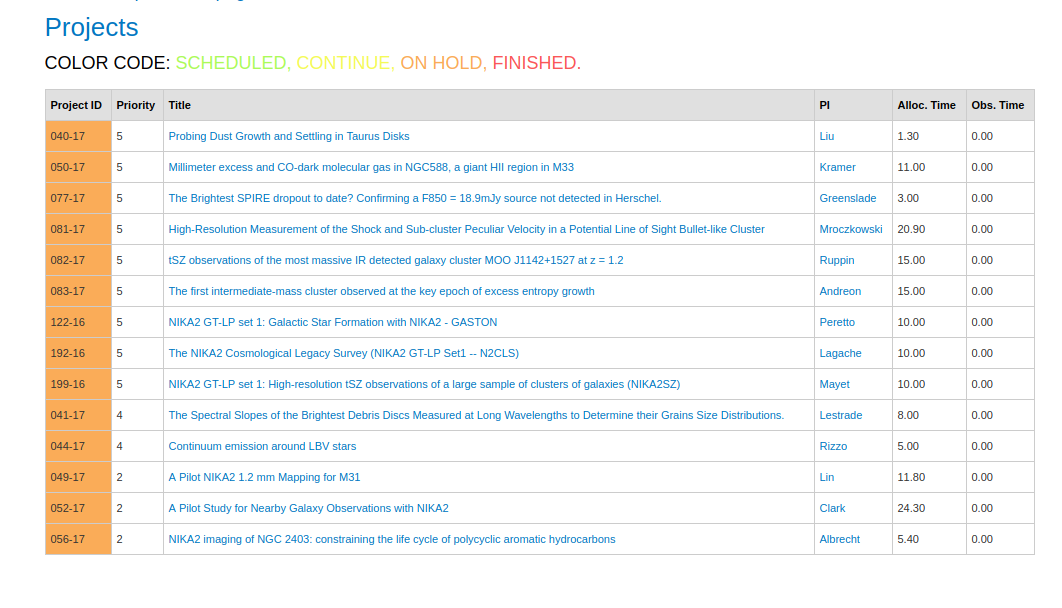
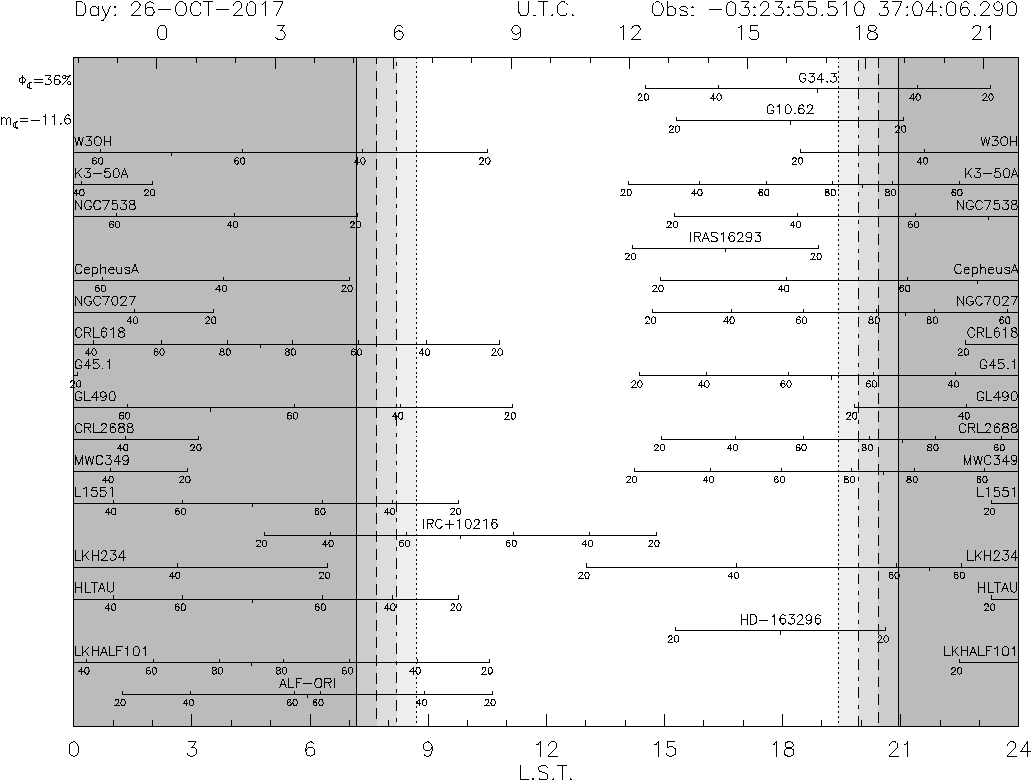
Projects have different priorities from 5 (highest priority) to 1 (lowest priority). Green color indicates that the project is scheduled, orange that the project is on hold, and red that the project is finished. Only green projects should be observed. To check the visibility of these projects go to the visibility tab:
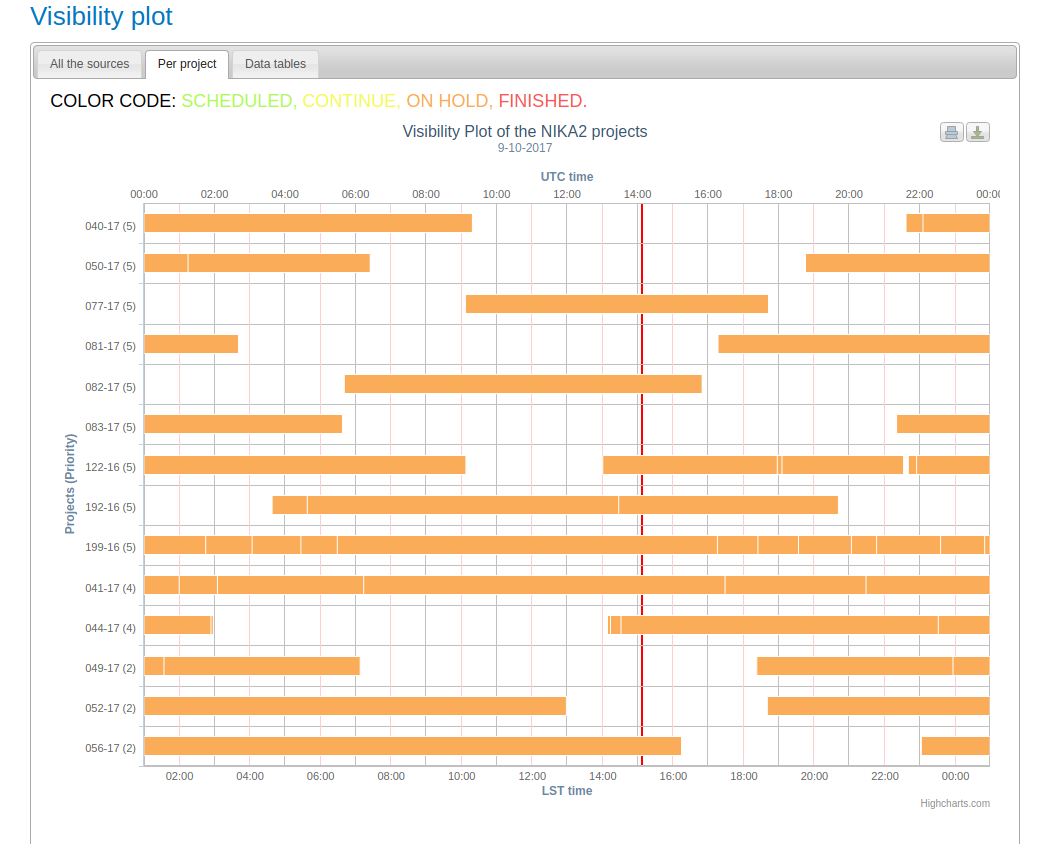
The red vertical line corresponds to the current time (UT). In case that none of the priority 5 projects have weather requirements (see the README files) compatible with the current conditions, go for priority 4 projects and so on.
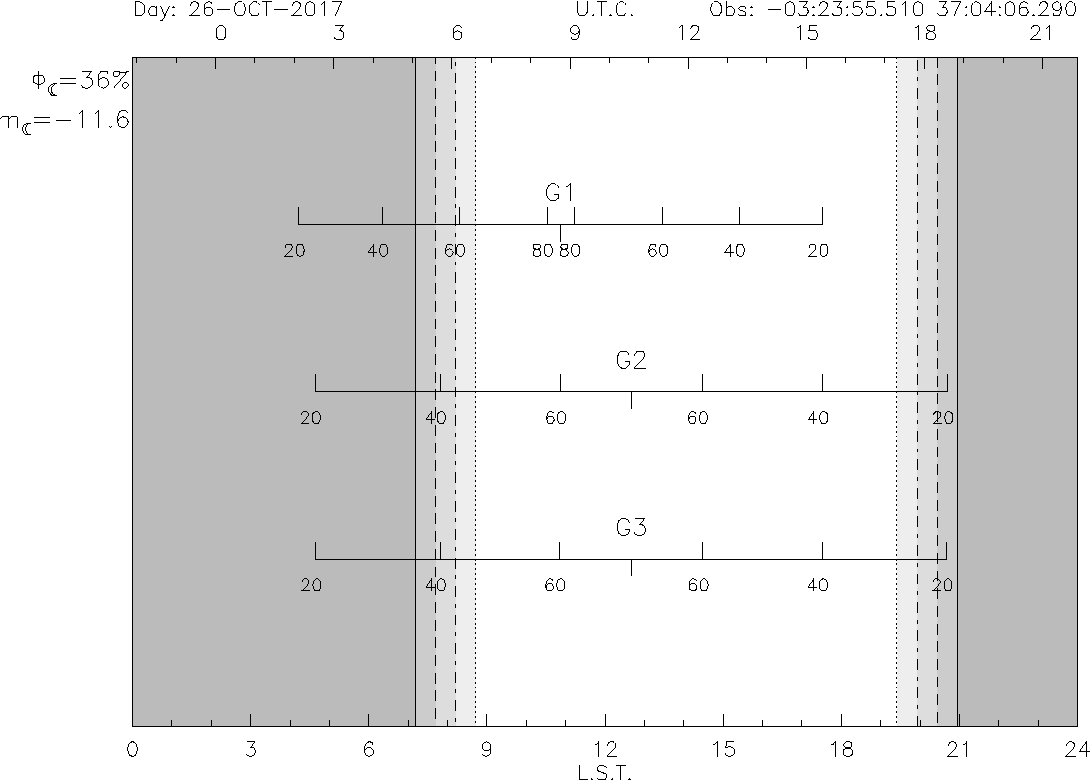
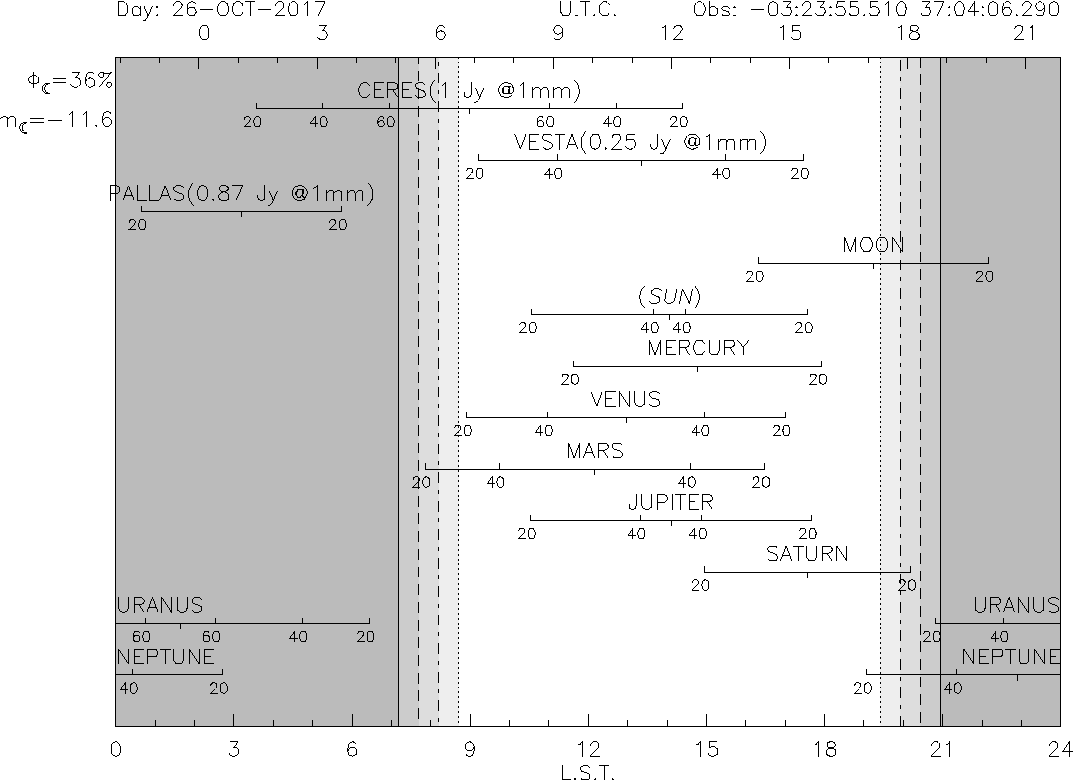
Below are some plots of (1) 3 faint point sources, to validate the NIKA2's instrumental ability to detect weak continuum sources @260 GHz, (2) Solar System Objects, (3) All secondary calibrators listed here: http://www.iram.es/IRAMES/mainWiki/Continuum/Calibrators#preview.
Project setup
The standard method to set the project is:
PAKO> set project XXX-YY
However, for pooled observations this is often done using a setup script (see for example setup_001-17.pako). For example, before to start to observe the project 001-17 you should type:
PAKO> @ ~/001-17/setup_001-17.pako
It is IMPORTANT to set the project accordingly before each observation in order to identify the scans observed for each project, keep control on the time used to observe each project, and write the data files in the right directory. When you will be doing tests, or if you have to stop by wind, or whatever, just type set project test. That way, no project will loose time due to technical problems, or bad weather.
Catalog of sources
Before to start to observe a certain project it is necessary to load its catalog of sources. Usually, this is automatically done within the setup script. If for some reason you need to load the catalog manually, type:
PAKO> SOURCE CATALOG 001-17.sou
This command will load the catalog 001-17.sou with the position of NGC4449. To select this source, just type:
PAKO> source NGC4449
To select a source from the IRAM catalog of pointing sources, just type:
PAKO> source pointing_source /cat * (or "iram-J2000.sou" for the given catalog)
Scripts preparation
Pooled observations should be fairly simple and straightforward to observe. Note that your project will NOT be observed in case you do not send your observing instructions to the NIKA2 Pool Manager before the begin of the pool. It is highly recommended to use the standard scripts provided by the IRAM staff:
Note that this script uses a non-optimal scan size. For the optimum scan size, see the above recommendation. You can download these example scripts and adapt them to your project. If you have questions please contact the pool manager.
Recommended scan sizes for science projects
To optimize the correction of data instabilities, the length of NIKA2 sub-scans, i.e. the size of scans along the scan direction should be at least:
NIKA2 FOV (6.5') + 2 * NIKA2 beam width (12" at 1mm, 18" at 2mm) + source size above the noise + 2s * scan speed
The third term makes sure that KIDs instabilities are properly corrected by data reduction. The fourth term is added because known tracking deviations of the 30m telescope can hinder the quality of data records, up to 2s after the beginning of each sub-scan.
Perpendicularly to the scan direction, there is no minimum size limit, but too long scans can expose to a risk of loosing tuning over time.
Note that the size computed in this way is the Delta(x) described in the exposure time calculator documentation, and not the size of the final map. The latter is larger by one FOV size.
Pointing Sources
It is possible to select pointing sources nearby to your science targets using XEphem and the IRAM 30m Catalog for Continuum Cameras.
Observing modes
We offer the on-the-fly (OTF) observing mode for the NIKA2 camera where data are taken continuously while the telescope follows a zig-zag pattern. The mode can be commanded as follows:
PAKO> @ nkotf xSize ySize posAngle tiltAngle otfStep otfSpeed System
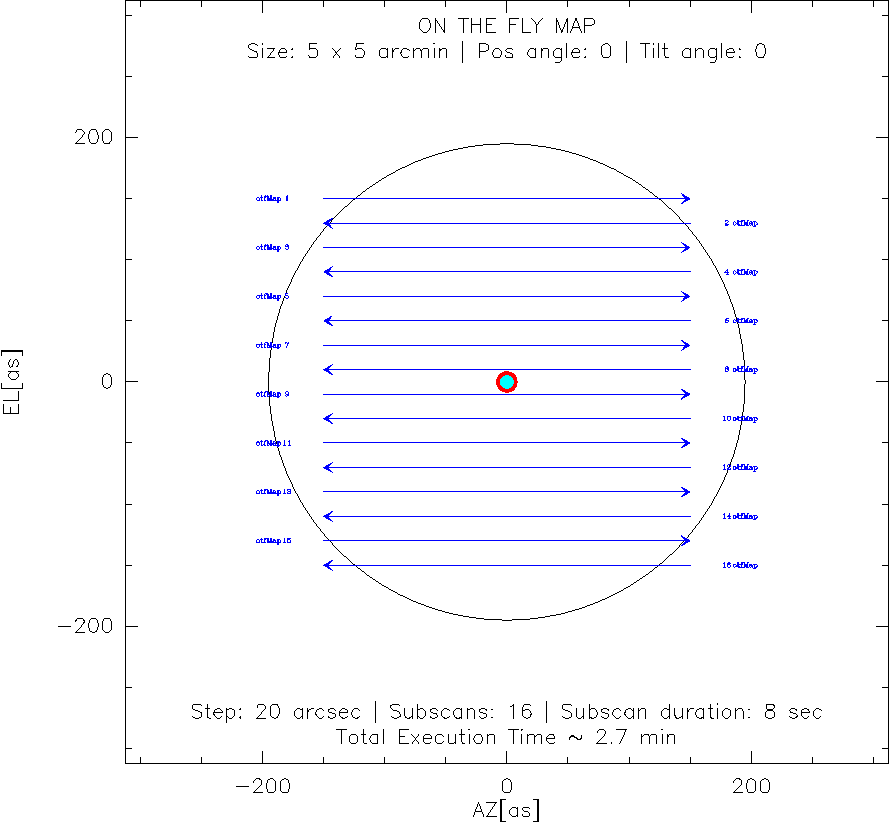
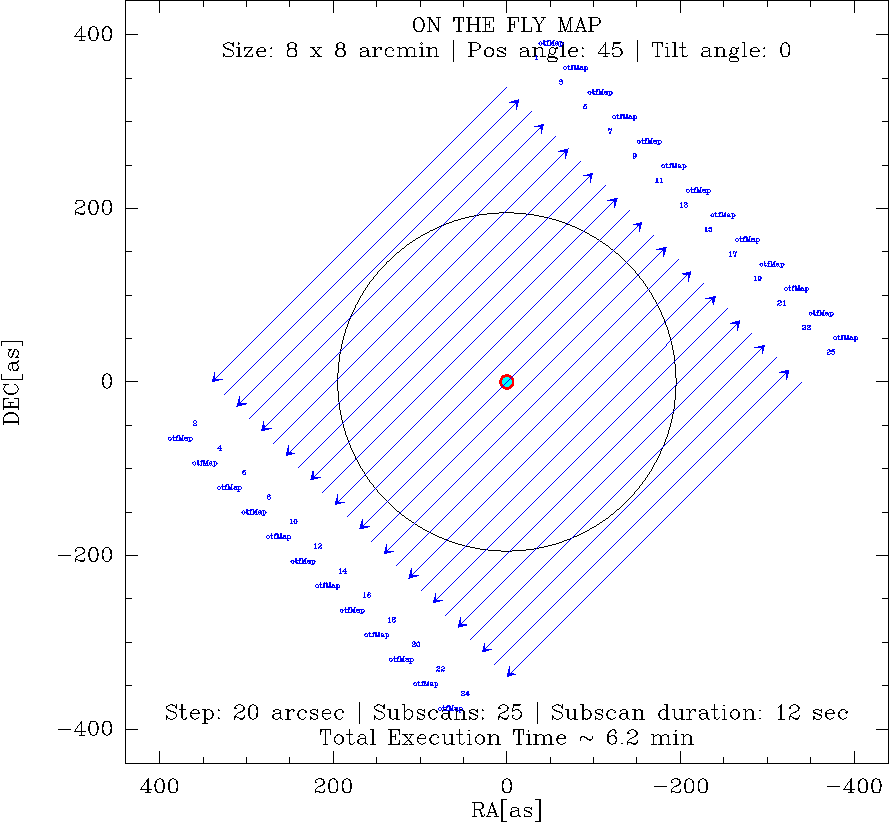
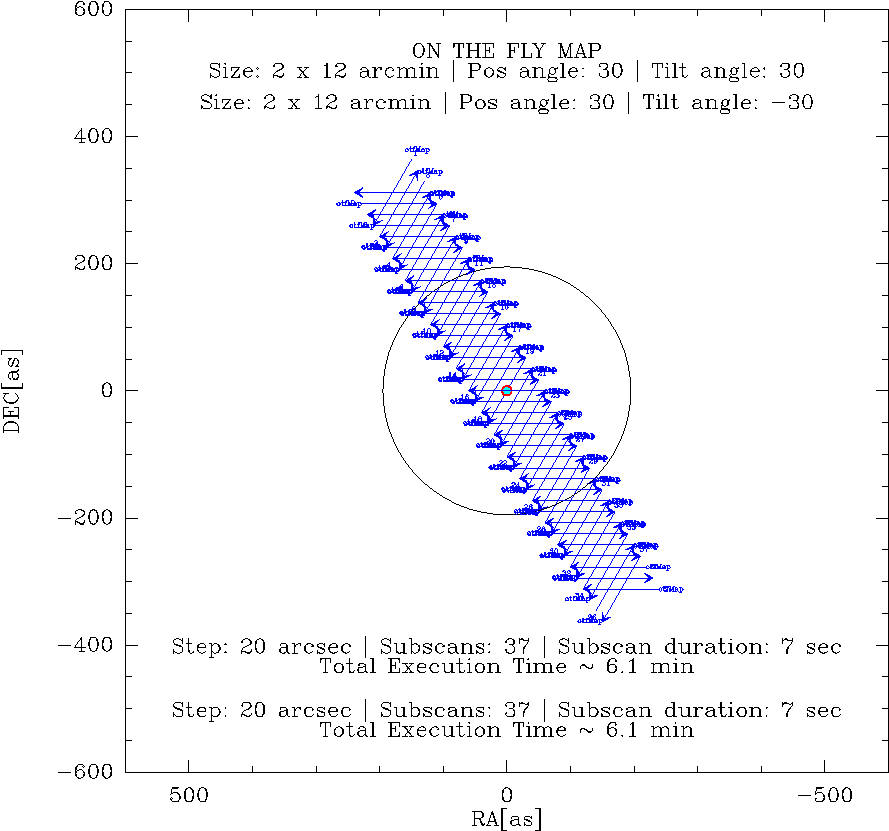
where xSize and ySize are the size of the otf map in arcminutes, posAngle determines the angle of the scanning direction (anti-clockwise), tiltAngle determines the inclination of the scanning direction (anti-clockwise, useful to map filaments), otfStep is the spacing between OTF lines, otfSpeed is used to set the scanning speed (in arcseconds/sec), and System set the reference coordinate system (radec or azel). The nkotf command allows to generate plenty of different scanning patterns. In the following, some examples are shown. See also the last section of the wiki Observing with NIKA2.
PAKO> @ nkotf 5 5 0 0 20 40 azel
PAKO> @ nkotf 8 8 45 0 20 40 radec
PAKO> @ nkotf 2 12 30 +30 20 40 radec
PAKO> @ nkotf 2 12 30 -30 20 40 radec
Contact: Angel Bongiovanni, Ioannis Myserlis, Stergios Amarantidis (NIKA2 NIKA2 Pool Management)
email: bongio@iram.es, imyserlis@iram.es, samarant@iram.es
Created: 2013.OCT.25, H. Hermelo
Updated: 2019.DEC.16, B. Ladjelate
Last update: 2022.AUG.20, A. Bongiovanni
